Showing posts with label diy. Show all posts

Tuesday, September 27, 2011

Lovely book page DIY


 There is something really beautiful about an old book.  Seeing the spine all torn up, knowing that somebody really loved it & the fact that should you not actually care to read said book...  you can turn the pages into some pretty sweet things!  It's all about recycling, kids!

I picked up this old crusty well loved book at my local Goodwill for one dollar.  Sorry, Marguerite Steen, I'm sure your story is lovely, but I  have other plans for this bad boy!

All you  need for this project is some old book pages, a glue gun and scissors!
  Make a paper chain!
Who doesn't love an old fashioned paper chain?  This lady right here does, for sure.
To make sure my links were all the same width, I folded a few of the pages together and trimmed away all of the blank edges except for the side that was bound in the spine.  I decided I wanted mine to be a little more understated than the average paper chain, so I went with smaller strips of paper(three lines of text wide).  You could go larger if you wanted!  With the pages still sandwiched together, I cut until i was half way through the blank space near the spine & then chopped all the blank space left on that one side off.  Now you have your perfectly even strips!  Clearly, the next step is to start looping those bad boys together.  I used hot glue because I like instant gratification, but craft glue would work just fine!
 How great would this be for a book loving couples wedding, a graduation party or just draped along your book shelf?
 Turn it into gift wrap!
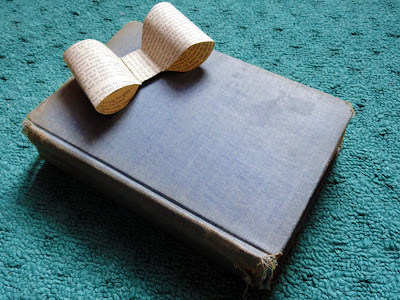
Now, clearly you could wrap something small up in an actual book page, but i'm going to show you how to make a quick gift bow with it!
Pull two pages from the center spine.  Chop off the bottom blank space and then make another cut about 15-20 lines up the page.  
Toss the blank space and set aside the larger top portion.  Take that 15-20 line portion and bring the blank edges together and glue.  Now fold that in half and trim the sides to make your bow shape.  Unfold and chop a strip off of the larger top portion you set aside a minute ago, wrap it around the center of your bow and glue.  Now fluff it up a bit & voila!  Instant gift bow!
 This project will take you less time to accomplish than reading the tutorial did!

That old book never looked so good!
[these projects were first shared by moi over at Indie Pretty... I just want to keep track of them over here & make sure I get to share them with y'all too!] 


Tuesday, September 20, 2011

DIY Smoothie Packs

Giveaways Feb. 20-24th, 2012!

If you're here from Pinterest, Welcome!  I hope you'll take a look around and follow along! Thanks for stopping by!


The inspiration for this came via pinterest, my newest obsession. I somehow managed to hold off on joining for quite some time and then finally caved a few weeks ago.  I'm HOOKED now!

I love smoothies, but with them going for $5+ a pop, it's not something I will allow myself to buy often.  Insert this quick smoothie recipe and I can have a smoothie anytime I like in a matter of minutes!

Here are my ingredients ready for prep.
I bought pre-frozen strawberries and blueberries because it was a better deal than buying fresh and freezing myself.  Also, the strawberries were already sliced so it saves me a little time!  
I chose weight watchers vanilla yogurt because, again,  it was the best deal. [Also chose to use a magic bullet instead of a big blender b/c a) they are awesome and b)less to clean!]
 First I measured 1tbsp scoops of yogurt into a mini muffin tin.  I didn't level it off, considering some of the yogurt was going to stick in the measuring cup.  Once they were filled, I froze them. [the recipe I found on pinterest used ice trays, but I didn't have any of those on hand so I improvised.]
 Next I got to chopping my fresh fruit!
 And then arranged them on a silpat mat and popped it in my freezer![You could use a baking sheet if you don't have a silpat!  I just chose something that would fit in my freezer & the fact that i could just roll all of the frozen fruit off when I was finished was a plus!] You want your fruit to be pre frozen before you combine them so that they don' freeze together in the packs.
 A few hours later when everything was frozen, I laid everything out to prepare to bag my individual "smoothie mixes".  If you use muffin tins like I did, let them sit out for a few minutes so they loosen up a bit, then use a spoon and they will pop out like ice cubes. [DON'T dip the bottom of the pan in warm water to loosen them up. I tried that(before i even bothered using a spoon) and they got melty really quick and i had to refreeze them!]
I used just short of a cup and half of fruit for each bag and 3 yogurt cubes.

After they are all bagged up, pop them in the freezer!  Next time you want a smoothie, you're ready to go!  Just add a little juice or milk and voila!  I may try to add a little oatmeal or wheat grass next time to pump it up even more since I'm treating the smoothies as breakfast.

I was able to make 8 smoothies with the amount of fruit I had. 
1 bag of strawberries, 1 bag of blueberries, 3 bananas and 2 kiwis.  My total cost was $11 including yogurt, which brings my total for each smoothie to a whopping $1.37 & averaging around 200ish calories.
Lacey-1        Smoothie King-0

[all photos via me]

DISCLAIMER:  I am not a nutritionist or health professional, I'm simply a girl who likes a quick smoothie! So, unfortunately, I don't know the answer to all of your great questions.  I know...  bummer.  I can only suggest that you google it!  That's what i would do!  If there is something you think I may know the answer to, I'm happy to try!  If you have a question that is health/nutrition related- I can refer you to a great Wellness Coach who I am sure would be happy to help you with your questions! 

linking up here:
link party palooza banner

Thursday, September 15, 2011

Old Book, New Art


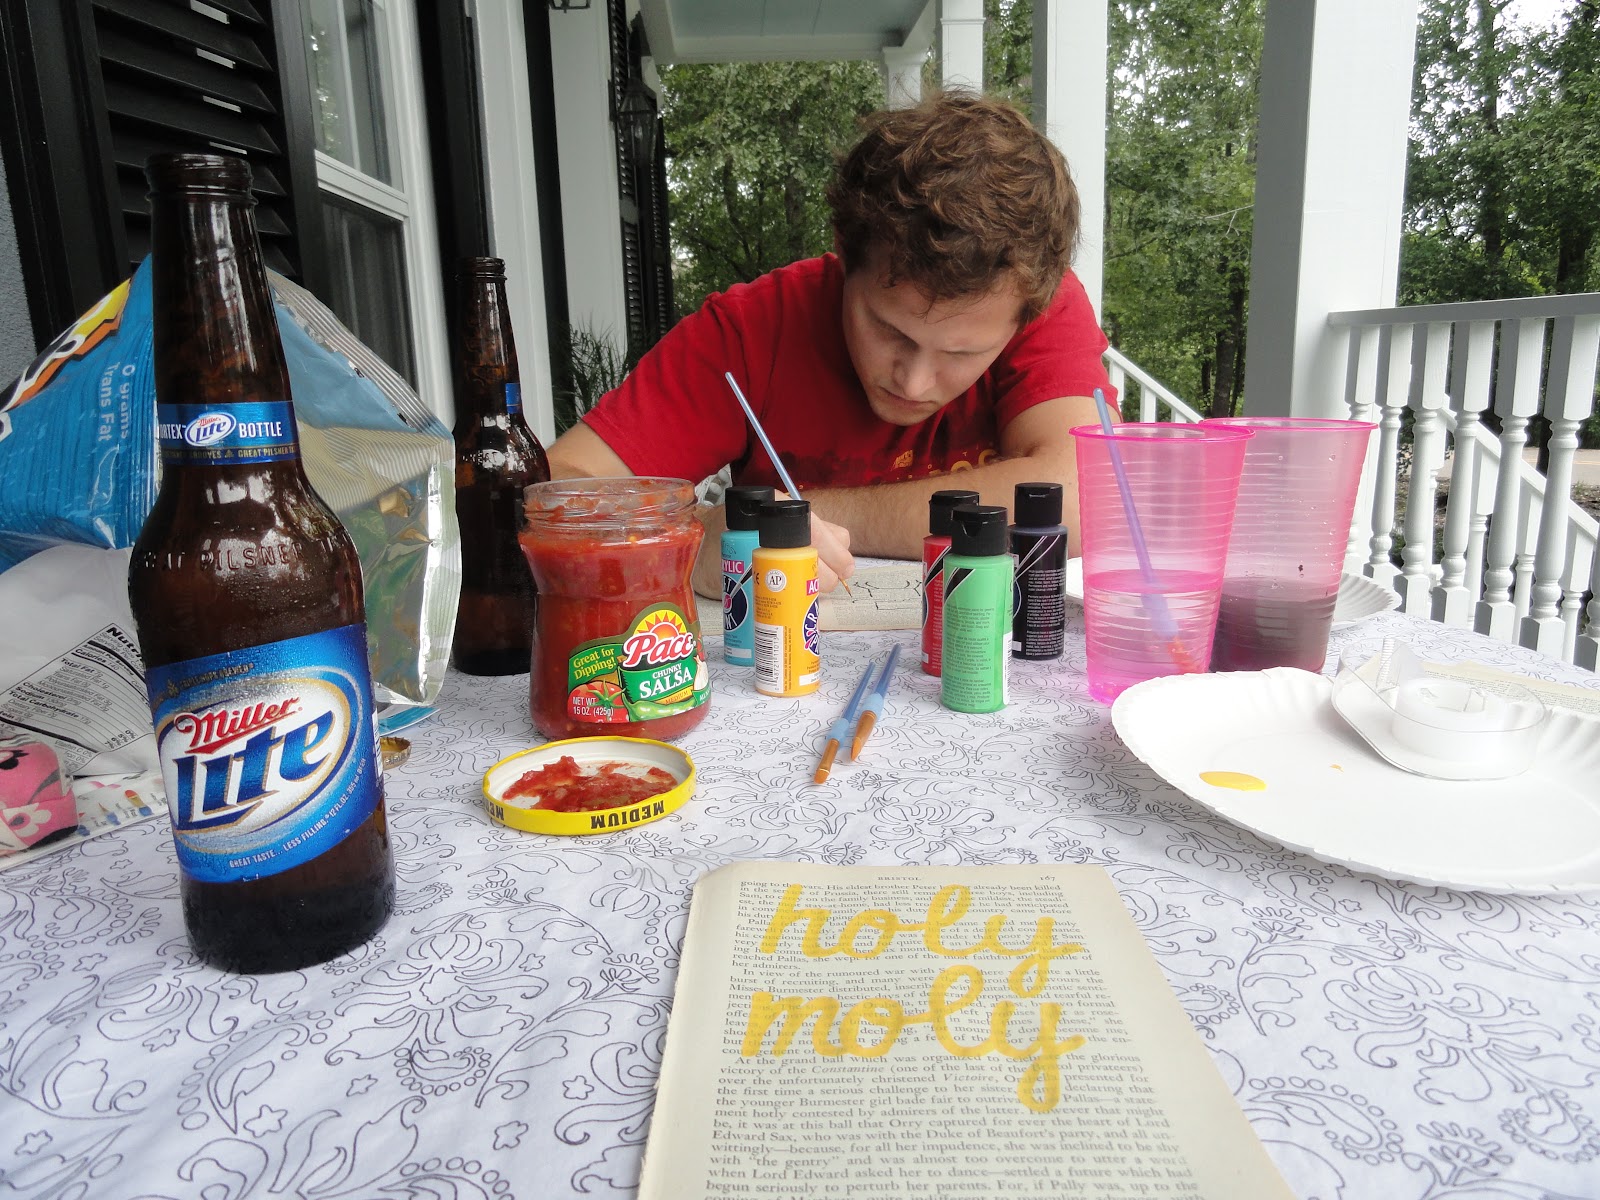
For Tropical Storm Lee, MR and I stayed at my parents house and spent most of the 3 day weekend pent up inside watching movies and such.  However, on Monday afternoon the rain stopped, the flood waters subsided, the weather became freakishly nice and we ventured onto the porch with an old book, a few craft paints, a bucket of beer(key to surviving a tropical storm) and some snacks.
 
 Sometimes little people come to visit and take over our dates. We're okay with it :)
(she is wearing her cousins jammies b/c I didn't want her pretty dress to get covered in paint!)
This was the outcome and I love them both oh so much!  I chose to keep it simple with some lyrics from this song.  How talented is my MR with a paint brush?  Love his little Indian man!


Tuesday, April 6, 2010

Have A Seat

Hey Y'all!
First, can I just say that I've been missing you?
Because I have :)

& Second... are you ready for a little chair re-do action?
You are?
GREAT, cause that's what I've got for ya!
Are we on the same page, or what?

I scooped this old gal up from GW [Goodwill, y'all] for $2.99!
I liked that she had a little bit of curve, but wasn't TOO dainty.

I started by taking her seat cushion off, because uhm...EW.

It was discolored and funky and I was afraid of what was waiting for me under there!
4 screws later and that bad boy was on the ground.


As you can see, I had good reason to be frightened of what was lurking under that lovely brown embossed faux leather. Ick.
To save you from having to look at that nastiness anymore, whatdaya say we go ahead and recover that funk?


There you go! Crisp, clean white! You can't go wrong.
Ready to paint? Me too.
I sanded it down just a tad first!

My favorite part to paint on chairs is the underside, because it gives the best views :)
Not a cloud in the sky! The weather has been amazing here.

I waited a day to make sure she was good and dry, and then I reapplied her clean new cushion!

Wowsa! See? She just needed a little makeup and a new outfit!

Chair: $2.99 at GW
Fabric: $1.00 in remnant bin at fabric store
Paint: Free! Glidden- Robin's Egg
Sometime last year I found a link on a decor blog abt taking a survey on Glidden's website and in return they would send you free paint! DEAL!
TOTAL: $3.99 + 3 hours


Not
too
Shabby


Visit thecsiproject.com